Spring is here and it is time to get your RV ready for that first trip. If you winterized your water system using RV antifreeze, you will have to flush it all out. While RV anti-freeze is not toxic, even a small amount left in the system makes water taste bad. Start by filling the system about three-quarters full with clean water to which you added a couple of capfuls of ordinary bleach. Drive the RV a bit to insure the mixture gets throughout the system. Next, fill the water lines by turning on the water pump and sequentially opening the taps. After letting the system sit overnight, connect to an external clean water source and let the water flush every outlet for at least 5 minutes. Open the hot water heater tank bypass so it fills up, if closed when winterizing as suggested. Drain and refill the fresh water storage tank.
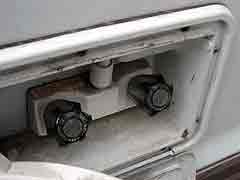
Visually inspection all hoses and water lines to assure they are intact and in good condition. Pressurize the fresh water system and inspect lines, connections and fixtures for leaks. Check the operation of dump valves on gray and black water tanks to assure the slide mechanisms operate without sticking and they seal completely. Replace damaged components as necessary. Install new water filter cartridges.
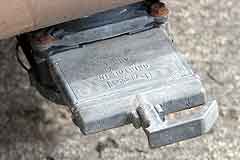
When replacing plumbing components, buy high quality ones. Quality hoses and fittings, especially sewer hoses, will last much longer and are less likely to leak. Older RVs may have gray polybutylene tubing and barbed connectors made of either gray plastic-like materials or brass with aluminum or copper crimp rings. Newer RVs will have red or white cross-linked polyethylene (PEX) tubing that is far less likely to break down and eventually leak. Old style brass crimp fittings and more desirable QEST fittings are usually compatible with both types. After installing any new components, test under pressure for leakage.
Typically, RV plumbing is designed to operate with water pressures of about 35-50 psi with the ability to safety handle pressures of up to 100 psi. In contrast residential water supplies have pressures of 80 to 150 psi or higher. Therefore, it important to install a pressure regulator between the RV’s water system and the outside water source connection to prevent leaks and even burst lines. The pressure regulator should be specifically for RV use and pre-set to control the incoming water pressure to 40-50 psi.
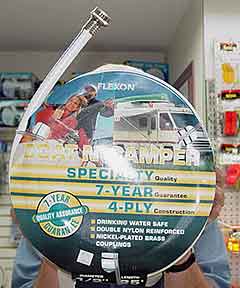
Never use your fresh water hose for anything other than moving fresh water and connect the ends together when not in use to prevent entry of foreign matter. Use hoses designed for fresh water, not a garden hose. With the latter, drinking water will taste like the water you remember drinking out that green hose when you were a kid. You can improve the taste and safety of water by installing a filter in the inlet water line, plumbed into water faucets, or installed as a separate filtered water faucet, if not already installed.
Remember to replace the cartridges usually annually, and perhaps more often for inlet ones that have to filter all incoming water. If you want to save propane, use only the pilot light to heat the water. While it take much longer, it can supply enough hot water for normal chores and if left on overnight, enough for a morning shower.
While not a maintenance item, do not forget that full water tanks are heavy and the weight must be accounted for calculating when determining your rig’s GVWR to prevent overloading. Each gallon of water, whether fresh, grey or black, weighs about 8 pounds so a mere 50 gallons adds about 400 pounds. Thus empty holding tanks before leaving home and fill fresh water just before you get to your destination.


