How many times have you disassembled an item to make a repair or replace a damaged part, then forgot how to put it back together again? Whether you are doing a ground-up restoration of a vintage car, repairing your daily commuter, or getting the washing machine running again, almost every project starts with the disassembly. Here are some tips on what to do during the teardown phase to prevent headaches during the assembly phase.
Take copious notes as well as make sketches and drawings of how things go together if the component is even relatively complex. Set aside time to document your progress while what you just did is still fresh in your memory. Memories fade after a few days, or months, when the replacement parts finally arrive.
When working on a vehicle or other piece of machinery, observe and record exactly how engines, transmissions, driveshafts, belts, starters, control panels , etc. are removed. This is especially important in later model vehicles with very crowded engine compartments and doing anything behind instrument panels.
Often components can only be installed in a certain way following a precise sequence of operations. Note if components have to be twisted or turned in a certain way to remove them. Do other components, structural members, or body parts have to removed first? Record the disassembly sequence so you can repeat it in reverse later.
Pay attention to details. For example, how the air cleaner sit is installed or the throttle linkage passes through the firewall. Note if more than one washer is used on any bolts and studs. If bolts and studs of different sizes are used, note that, and where did each come from? Note the clearance between components, how linkages are attached and routed, how belts and hoses are installed, and how brackets are mounted. Also note how parts separate from mating parts. Do they slide off easily or take some force to take apart? Is is normal, or is because there is damage? Do moving parts have to be in a particular position for removal?
When disassembling components with lots of small pieces, not only make sure items are not lost, but you know where each goes. Note any parts that extend or contract in length, held in compression or tension or are twisted when installed. If parts are direction dependent, record the correct direction.
A digital camera is a great way to record disassembly steps. When taking 'before' photos, take them continually during the teardown, not just before starting. This is especially important for large and complex components that come apart in layers. Photograph each layer. Then make sure to save images in a safe place, not on the digital camera. Make backup copies or print them out.
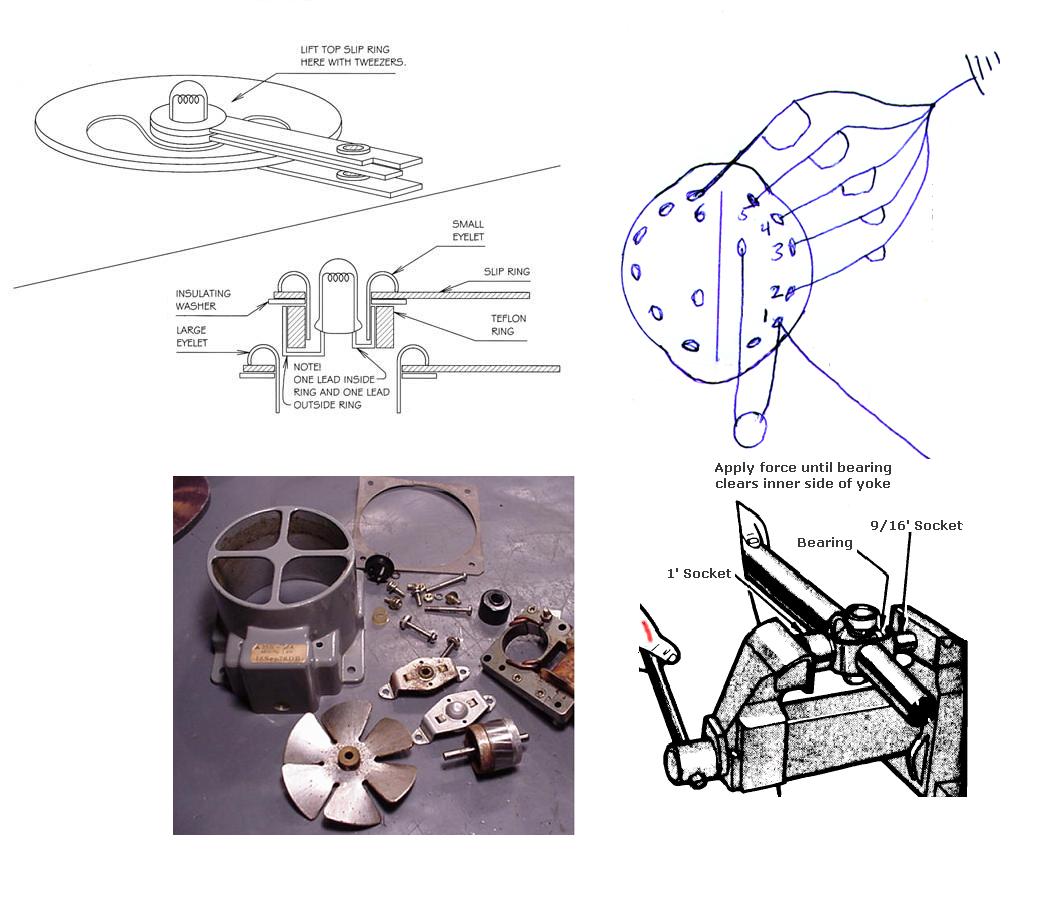
Note how wiring is routed to prevent touching hot spots and keeping insulation from being damaged or cut by moving parts. Are any special brackets, ties or other mounting techniques used to keep wires in place? Prepare a drawing showing which wire is attached to which terminal. Often this will be easier to follow than wiring diagrams when hooking things up again. Also wiring diagrams can be wrong or the wiring layout may be different on your particular item. A drawing is a must if no wiring diagram is available.
As you teardown, watch for small parts like springs, spacers , washers and check valve balls that can fall out and get lost. Doing teardowns on a clean workbench rather than a greasy garage floor really helps here. Put small parts in covered jars and cans, tough plastic bags, or heavy-duty envelopes. Label everything and tag larger parts.


