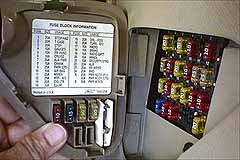
Changing a fuse is as easy as changing a lightbulb. Vehicle electrical accessories continue to add convenience and comfort to our lives. Unfortunately, the more buttons and switches on the dashboard, the more likely to have one of these electrical accessories fail. Combined events of vibration, weather, and age can eventually reveal the weakness of almost any electrical circuit. Sometimes unforeseen events, such as sweet little three-year-old Junior putting dimes in the cigar-lighter socket, can put out the interior lights. In any event, electrical circuits are usually well protected by a simple devise called a fuse.
A fuse is simply an intentional "weak spot" in the electrical circuit. If the circuit is in danger of overheating or damaging other electrical components, the fuse element basically melts apart inside. By melting inside, the "blown" fuse shuts OFF the electricity on that circuit. Until the problem is repaired and the fuse is replaced, all electrical devices on that circuit will remain OFF.
All automotive fuses are NOT the same. There are many designs and types of fuses, but a large number of American manufactured vehicles use a blade-type fuse. Fuses are designed and rated differently according to the power requirements of the circuit. Colors and numbers on fuses classify typical ratings. Numbers represent the amperage rating of the fuse; for example a red "10" would be a "ten Amp" fuse. Do NOT replace a blown fuse with a bigger, higher amperage fuse as expensive circuit or component damage could occur. Always replace blown fuses with properly rated fuses according to the vehicle owner's manual.

The first response to non-working electrical devises is to check for a possible blown fuse. Read the vehicle owner's manual to find the fuse panel or panels. Some fuse panels will have a removable cover, spare fuses, a fuse-puller, and a handy circuit identification chart.
Use the owner's manual or circuit identification chart to locate the suspected fuse and determine it's proper amperage rating. Fuses are easy to remove and replace as they just press into the fuse panel. With the fuse-puller (or fingers) pull out the fuse for inspection.
Look through the transparent side of the colored plastic fuse to determine its condition. A good fuse will have a thin strip of metal from one end to the other without any noticeable breaks. Blown fuses will have all or a portion of the metal melted away inside.
Another way to check a fuse uses a 12-volt test light. An advantage of checking fuses with a test light is the fuses are not removed from the fuse panel. This quick and easy method is frequently used by many automotive technicians, but will require the purchase of a non-powered 12-volt test light tool.
Simply clip the test light wire to a non-painted, grounded, metal surface. With the ignition key in the ON position, touch the test light probe to the small metal tabs on the top of each fuse. If the test light bulb does not light on any of the fuses, the clip connection is probably poor. Recheck the clip connection or move it to another surface.
A good fuse will light the test light on BOTH small metal tabs on the fuse top. A light on only one metal tab of a fuse indicates a blown fuse.
If it is not apparent whether the fuse is good or bad, replace it with a new one. Fuses are not expensive. In the event a replaced fuse blows again, there is still an electrical circuit problem and will need further professional diagnosis and repair. Help the automotive technician by noting all the electrical devices that do not work and any unusual circumstances -- such as a recent traffic accident. Be patient, some electrical problems are very difficult to solve and take considerable time. Who knows -- perhaps the technician will find out where Junior's money really went!


